
Zoom is rich with features, many of which you may have never heard about. No matter how long you’ve been using the video conferencing app, there are a number of helpful and fun tips, tricks, and hidden features you can find to upgrade your video chatting experience.
Zoom meetings have been a normal part of many employees’ and students’ lives for the past two years. However, many of us aren’t actually using Zoom to its fullest potential. Today, we’re sharing our 21 best Zoom tips and tricks for a better virtual meeting experience that will impress your boss and improve your overall experience.
21 Best Tips & Tricks for Zoom Meetings
1. Schedule recurring zoom meetings with the same link
Did you know you can schedule recurring Zoom meetings with the same link? This hack can save you time and your coworkers frustration should they lose the new link for regular meetings.
Schedule recurring meetings with the same link by signing into your desktop extension. Click on the schedule icon, which looks like a calendar with the date on it, then set your meeting settings, including the topic, name of the meeting, time, time zone, and date. You’ll also see an option for creating a recurring meeting ID. Select this option and save your meeting link to complete your regular meeting link.
Share this link with your coworkers, and note that it is a recurring meeting link, so they won’t need a new one each week. It may take a few weeks for them to remember this, but the time and frustration saved in the long run will be well worth it.
2. Mute Yourself Automatically in Zoom meetings
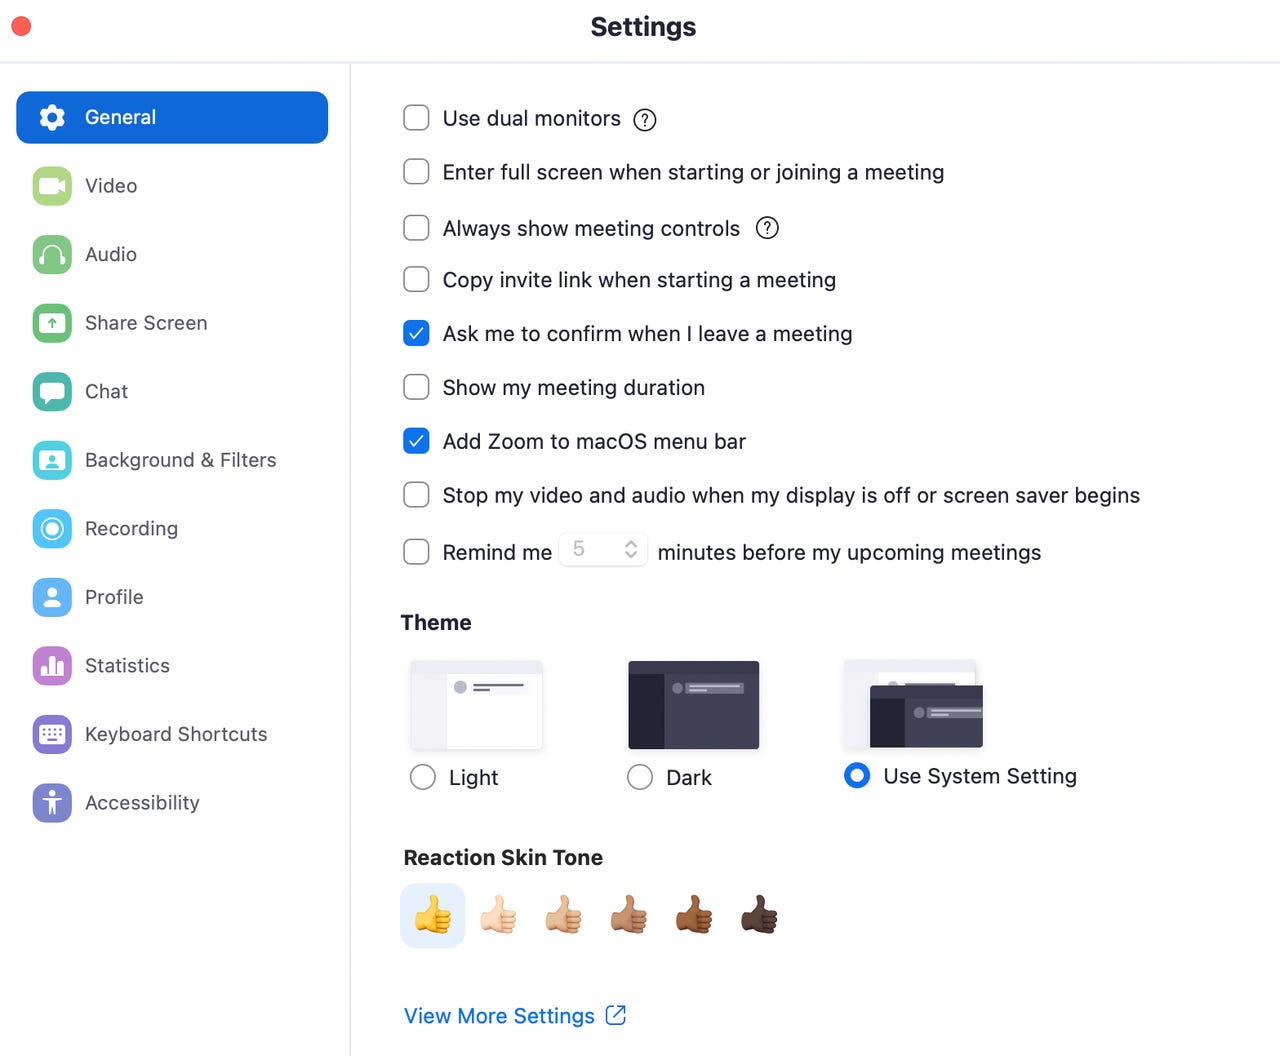
Most Zoom accounts have mute turned on automatically. However, if you find that your account automatically turns on with the mute off, you can easily change this in the settings to prevent noisy distractions from bothering your coworkers. You can also mute yourself during Zoom meetings when needed.
When you are called on to speak, stop scrambling to click the microphone button. You can press and hold the spacebar to quickly mute and unmute your mic, right from your keyboard.
- Go under ‘Settings.’
- Click ‘Audio.’
- Select ‘Mute microphone when joining a meeting.’
3. Automatically turn the camera/video off
Likewise, having your camera turn on every time you join a meeting can be frustrating. Not only does it not give you time to settle down in front of the camera and pull your notes up, especially if you were running late, but it can be jolting to have your audio and video start automatically the second you join zoom meeting.
If your video is always on, take the following steps to disable your camera from automatically turning on upon joining your Zoom meetings:
- Go under ‘Settings’ once the Zoom call has started.
- Then click ‘Video.’
- Select Turn off my video when joining a meeting.’

4. Use Notta to help with Zoom meeting minutes
Have you ever felt overwhelmed trying to take notes during a meeting? Notta can automatically record and transcribe your Zoom meetings, so you’re not left scrambling to keep up during the call.
- 1. Start by going to Notta.ai and creating an account.
- 2. Next, you’ll want to start your Zoom call.
- 3. Click ‘Participants’ and ‘Invite.’
- 4. Then copy the invite link and go to your Notta dashboard. Click ‘join Zoom live meeting’ and paste the meeting invite link into the field.
- 5. Click ‘transcribe now,’ and the Notta Bot will automatically join your meeting and record and transcribe everything said.
Don’t forget to let others know they are being recorded. This is a common courtesy when recording a meeting. For more information on using Notta to live to transcribe a Zoom meeting, check out our step-by-step breakdown here.
5. Host more than 100 people
If you have a group of more than 100 people to host for work or school, you have to upgrade to a paid professional account. If you upgrade to the highest tier (Enterprise Plus), you can host up to 1,000 participants.
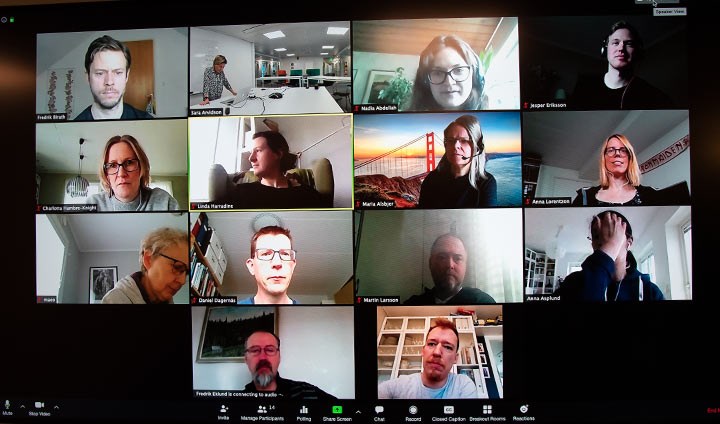
6. Check the Zoom meeting’s participant list
Seeing who is on the Zoom meetings can help you prepare for surprises. Once you are in the meeting, look at your setting bar at the bottom of your screen. Click participants and the complete list of current participants will appear on the right-hand side of your screen. If you are the host, you can also choose to remove people from the call using this list.
7. Hide non-video participants
On a larger call, your screen can get cluttered with participants, which can be distracting, especially if some don’t have their cameras on. Hide the participants who aren’t using video by going to Settings > Video > Meetings, and check Hide non-video participants. Now you’ll only be distracted by your co-workers’ pets and children who appear on the video.
If you’re in a large meeting, it can quickly become distracting to see many black screens with just names listed. If you only want to see participants with cameras on, go to your settings. Then click ‘Video’ and ‘Meetings.’ Under the meetings tab, you’ll find the option to hide non video participants.
8. Turn off or limit chat
Zoom’s chat feature is another great way to communicate with others in a meeting. If the chat is going off the rails and becoming a distraction, the meeting host can turn off chat, limit participants to only message the host, or turn off chat completely. To do so, click the More dots in the chat side window and choose between No One, Hosts, Co-hosts, or Everyone.
9. Share your screen
Sharing your screen with others during the meeting can make demonstrations and presentations significantly more manageable and more engaging.
To share your screen with other meeting attendees, click the ‘Share Screen’ icon on the Zoom meeting toolbar located at the bottom of your screen. Zoom will prompt you by asking if you want to share your entire desktop or just one of your open computer windows. Select which option is best for your situation and set it up, then click ‘Stop Share’ at any time to turn off screen sharing.
10. Change your Name & Add Pronouns on Zoom
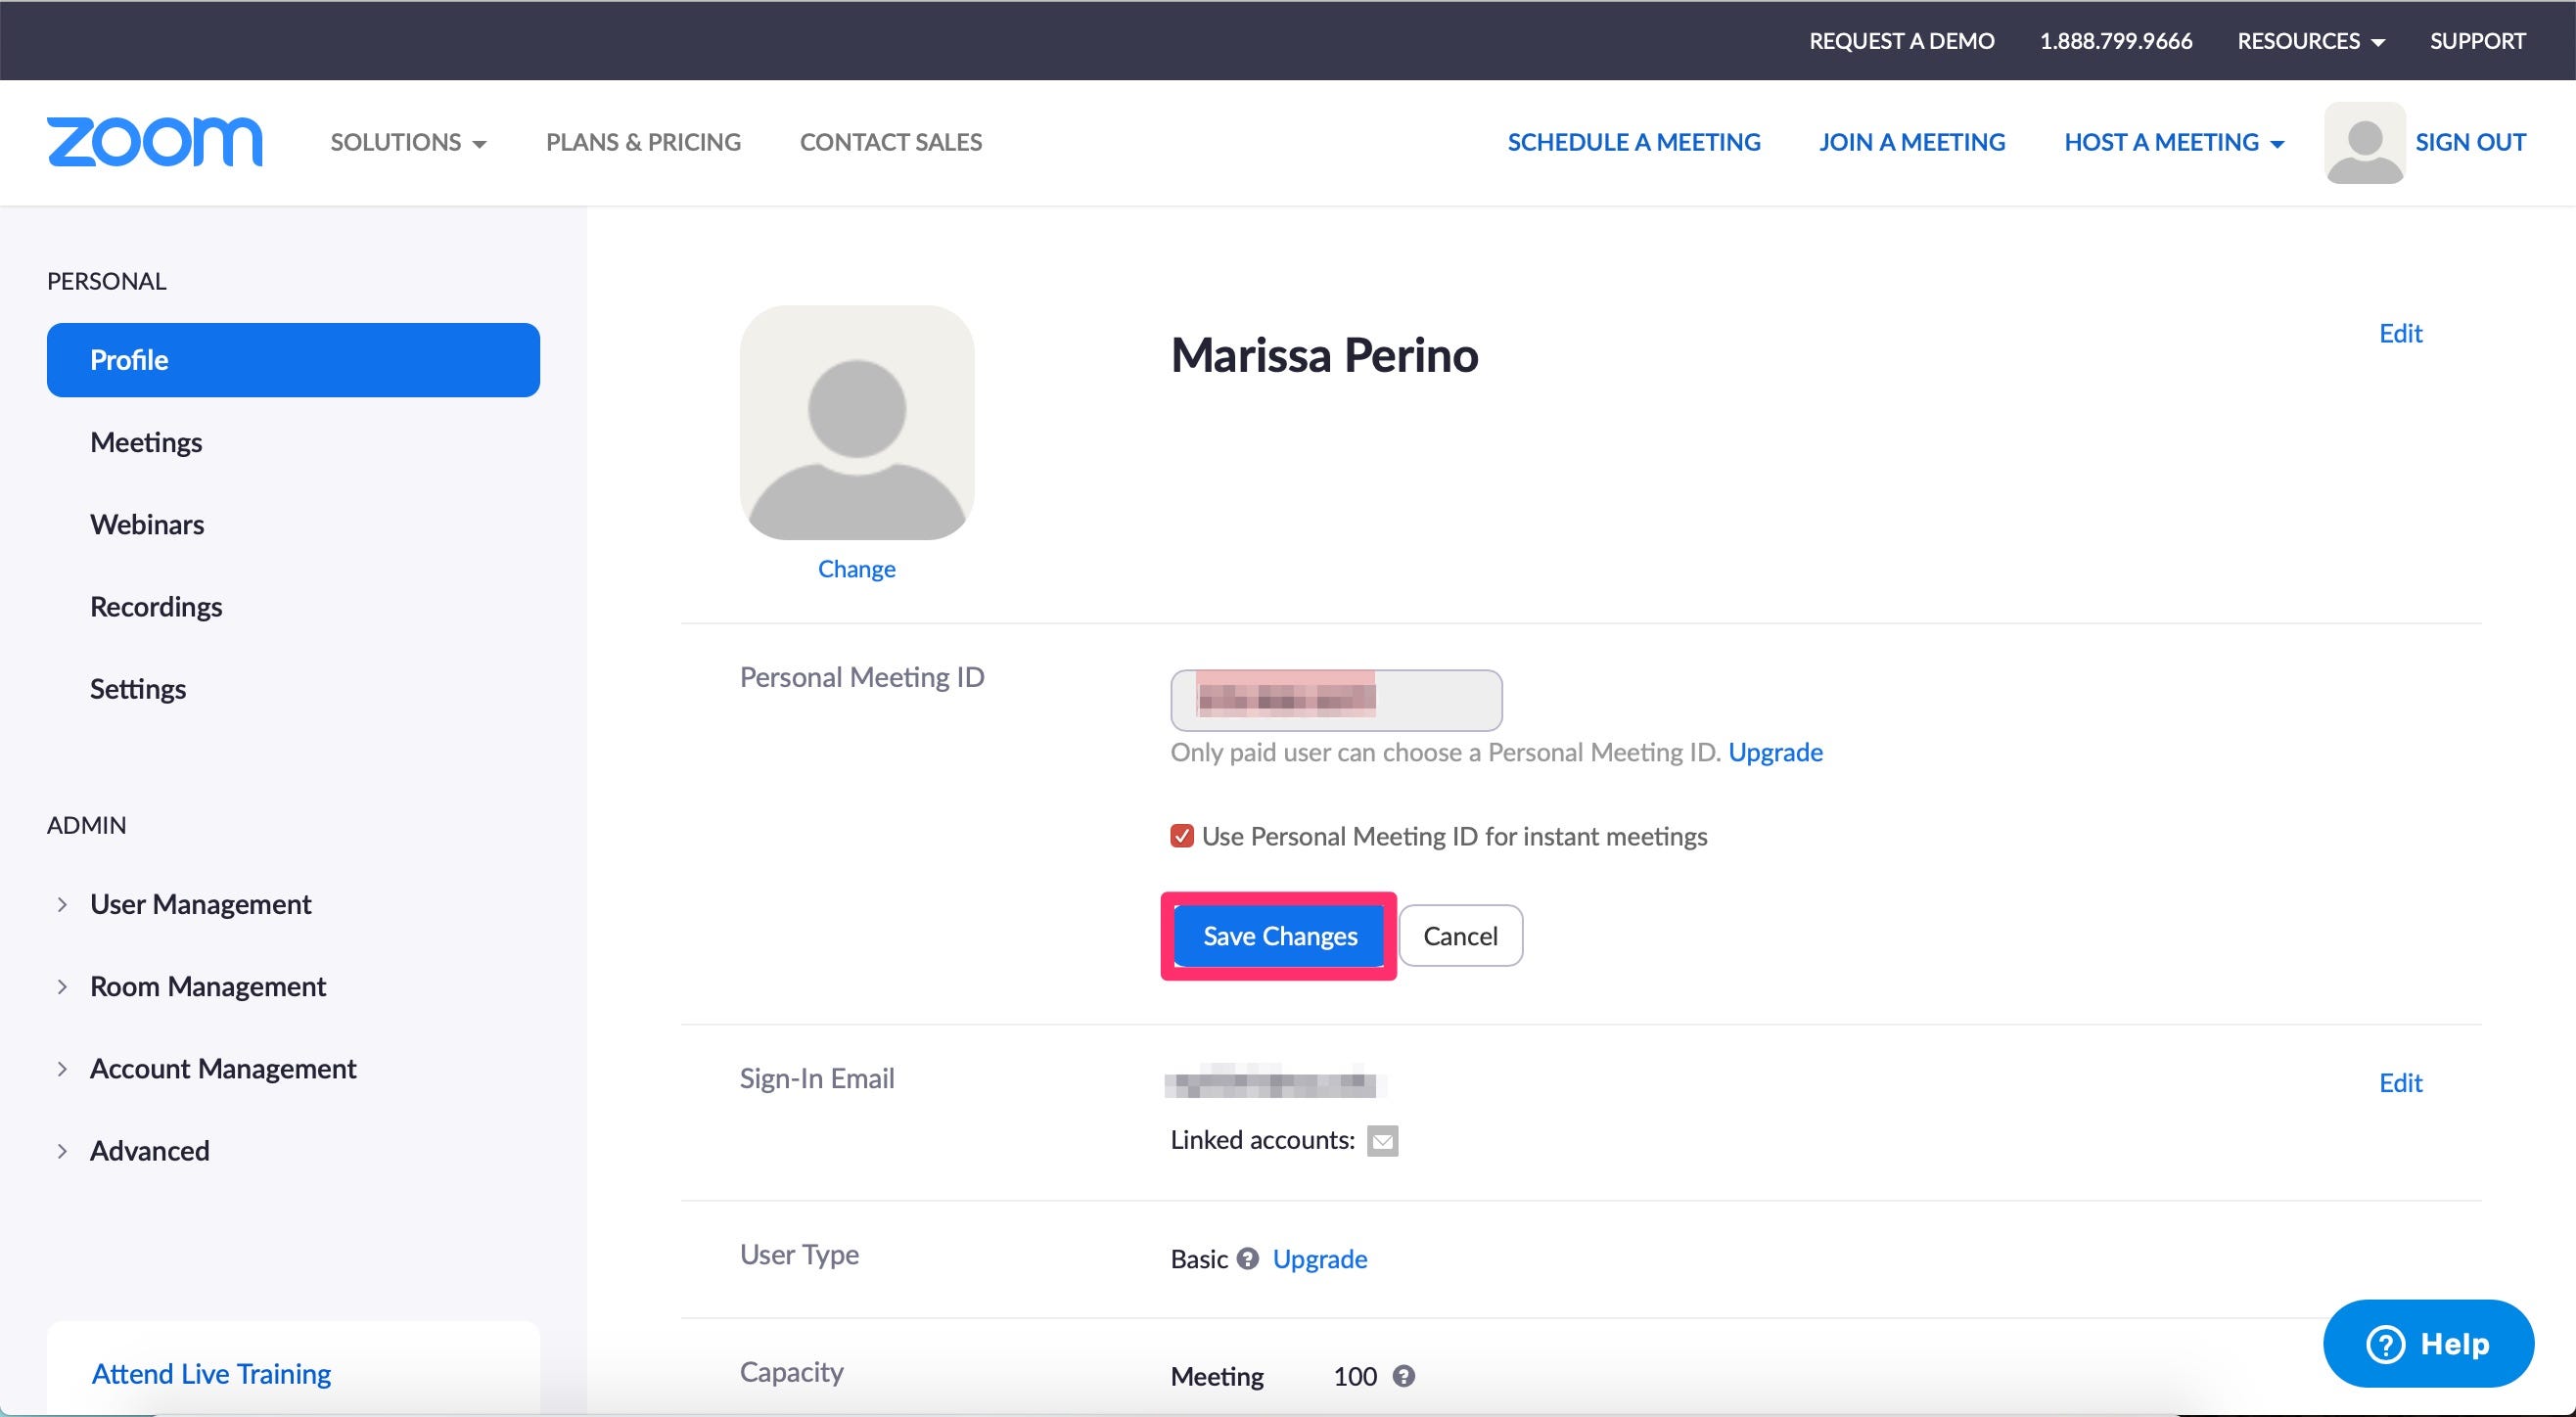
Changing your name on your Zoom account can make you look more polished and professional. Avoid having a misspelled, all lowercase name or using nicknames that others would not recognize you by.
To change your name on Zoom permanently, go to the web portal and log into your account. Click ‘Profile’ and ‘Edit’ next to your current name. Type in your new name and click ‘Save changes.’ Similarly, if you want to add your pronouns which is an inclusive step for others and ensures that your coworkers never have to guess about your pronouns, go to ‘Profile’ and ‘Edit’ next to your current name in your portal. Then, type in your pronouns under the display name where a pronoun is provided. Click ‘Save changes.’
Adding your pronouns to your name on Zoom is one way to make meetings more inclusive of transgender, gender nonconforming, and gender nonbinary people. Including your pronouns can ensure you aren’t assuming anyone’s gender identity based on their appearance, as well as normalizing the use of pronouns in different settings. Similar to changing your name, you can add your pronouns either for every meeting going forward or just for the meeting you’re currently in. Read the full instructions for adding your pronouns on Zoom.
11. Add a profile picture on Zoom
Zoom lets you change your name and add a profile picture that will appear if your camera is off. If you need to turn off your video temporarily, we recommend having a professional profile picture saved to your Zoom account. To add a profile picture for an individual meeting, after you enter the meeting, click the Participants button at the bottom of the screen. Hover over your name, and click More > Add a profile picture. Select the picture you want from your computer, and click Open.
To add a permanent profile picture to your Zoom meetings, go to the Zoom web portal and sign in to your account. Click Profile. In the top right corner across from your name, click Edit. Under the empty photo icon, click Change > Upload. Select the picture you’d like from your computer, and click Open. Readjust which part of the picture you’d like to appear, and click Save.
12. Change your Zoom background
Nobody wants to stare at a messy background. Change your Zoom background to space, or a custom photo.
If you can’t set up a tidy and professional environment, consider choosing a Zoom background through the app. On desktop or mobile, go to settings, then click ‘Virtual Background.’ It has many free background options for your virtual backdrop, or you can choose to upload your own option.
Virtually transport yourself to the beach, outer space or anywhere else you can imagine by customizing your Zoom background. You can read our step-by-step guide to changing your background on the desktop and mobile app, but basically, you go to Settings > Virtual Background and select or upload the image you want from there. However, you do have to make sure that your system meets all of the requirements to do so.
Double-check that your computer meets all the requirements for a Zoom virtual background before attempting this. Otherwise, the results may be less than stellar.
Put yourself in the same virtual background as your coworkers with an immersive view
Try out Zoom’s immersive view feature to put yourself in the same virtual space as your fellow meeting participants. Zoom’s immersive view feature lets you put yourself in the same virtual background as your fellow video chat participants — be it a conference room, classroom or anywhere else you can think of. If you’re the meeting or webinar host, start the Zoom meetings on your desktop (it will be enabled by default for all free and single pro accounts using Zoom 5.6.3 or higher). In the top right corner, where you find Speaker or Gallery View, you’ll see the option to enable Immersive View. Click Immersive View, and choose from one of Zoom’s provided scenes, or upload your own.
13. Set up a waiting room for added privacy
Are you worried about unwanted guests crashing your Zoom meeting?
One way to help prevent unwanted guests from crashing your meeting, or Zoom bombing, is by enabling the Waiting Room feature, so you can see who’s attempting to join the meeting before allowing them access. To do so, go to Account Management > Account Settings. Click on Meeting, then click Waiting Room to enable the setting.
Once activated, this will allow attendees to join zoom meeting waiting room. However, they won’t be able to access the meeting until the host lets them in. If unwanted guests show up, don’t allow them in.
14. Create Zoom breakout rooms for smaller GD
If you host large Zoom meetings, consider creating breakout rooms to allow small group discussions. The Zoom meeting host can manually sort participants into separate Zoom call sessions or allow attendees to select and enter any breakout room they want. At any point, the host can enter any breakout room to monitor everything going on.
Split your big Zoom meeting into up to 100 separate smaller sessions with breakout rooms. You’ll need to host the Zoom meetings to create a breakout room. Then, go to account management and find the account settings. To start a breakout room as the host, go to More > Breakout Rooms. Under the Meeting Tab, click ‘Breakout Room’ and make sure the option is on. An option to allow meeting hosts to assign participants to particular breakout rooms will also be available. If the option to turn on breakout rooms is gray, you’ll need to reach out to your Zoom administrator to unlock the function.
The meeting host can choose to split meeting participants into separate sessions automatically or manually or can let participants select and enter any breakout session they like. The host can switch between sessions at any point, rename rooms, and set time limits for the breakout rooms to close.
15. Choose a co-host for your Zoom meeting
If you are planning a large meeting or want a wingman to help manage the discussion, consider choosing a co-host for the Zoom meetings. Simply open the participant window during the meeting, click ‘Manage Participants,’ then select the individual’s name and click ‘More.’ Find the co-host option and select it. Assigning someone co-host privileges will give them more administration options, like muting or removing disruptive attendees.
Please keep in mind that you do need a Pro, Education, Business, or API Partner account with Zoom to have the option to assign co-host privileges to another individual.
16. Learn handy keyboard shortcuts
For those who don’t like clicking around their screen, Zoom has a ton of helpful keyboard shortcuts to help you navigate the Zoom app (free Zoom download) on your desktop without using your mouse. You can find commands to join a meeting, start or stop recording, enter full screen and share your screen. Check out Zoom’s full list of hotkeys and keyboard shortcuts.
- Alt+A combo: To mute and unmute your audio.
- Alt: To hide or show your meeting controls.
- Alt+N combo: Switch your camera when using multiple cameras.
- Alt+F combo: To enter or leave the full-screen view.
- Alt+C combo: Start or end cloud recording.
- Alt+S combo: To start or stop screen sharing.
- Alt+Shift+T combo: Take a screenshot.
17. Automatically Collect Information from Zoom Meeting Attendees
Have you ever wanted to collect information from everyone attending the meeting but dreaded the thought of sending mass emails out to do so? Zoom has a built-in meeting registration form you can create and use to gather information from meeting attendees.
To create a meeting registration form, locate the My Meeting tab of your Zoom web app (download Zoom for Windows) and click on registration. From there, Zoom will prompt you to create questions and fields for attendees to answer. Zoom will automatically suggest specific fields, such as the meeting participant’s name and email address. In addition, you can add custom questions to the meeting registration form to collect data from your attendees.
18. Use a mouse spotlight or vanishing pen to highlight
If you’ve ever watched someone share their screen on Zoom and struggled to follow along, you’re not alone. Next time you share your screen at an online Zoom meeting, consider using the mouse spotlight function to enhance the experience and make it easier for others to see what you’re clicking on.
Once you start sharing your screen or a whiteboard, a bar will appear at the bottom of your screen. Click ‘Annotate’ and then select mouse spotlight to enhance your mouse. You’ll also see options for adding text or stamps, drawing on the screen, and highlighting options to improve the screen-sharing experience for others.
Zoom’s vanishing pen feature lets you highlight text as you share your screen. Its vanishing pen feature lets you draw on your shared screen to call attention to text or objects but then fades away so you don’t have to go back and erase your markings. To use it, share your screen, and click Annotate. On the menu that pops up, click Spotlight and click Vanishing Pen.

19. Record the Zoom meeting on your Computer or Cloud
Both free and paid Zoom subscribers can record their meetings on their laptop or computer using the desktop app (you can’t record on mobile at the moment unless you have a paid account — keep reading for more on that). Those recorded files can then be uploaded to a file storage service such as Google Drive or Dropbox, or a video streaming service such as YouTube or Vimeo. To enable local recording, go to Settings > Recording, and toggle it on. When you’re hosting an online Zoom meeting, click the Record icon on the bottom toolbar.
Record a meeting on the cloud – If you have one of Zoom’s paid plans (which start at $149.90 for the year), you can make a recording that will save directly to the cloud (or to your computer if you prefer). To use this feature, click Record at the bottom of the meeting screen. You can pause or stop your recording at any time. Zoom will notify you when the recording is ready.
20. Use the Whiteboard tool
The Whiteboard feature allows participants to collaborate on a sharable canvas that you can access even outside of meetings. To enable Whiteboard, make sure you’ve updated to the latest version of Zoom. Click Whiteboards at the bottom of the menu screen, choose New Whiteboard, and click Open and Collaborate. You can choose if participants can view only or edit your board. Clicking Close Whiteboard will automatically save your Whiteboard for future use or viewing.
21. Touch up your Appearance & Use Emojis
Zoom recently introduced the beauty filter, which can digitally touch up your appearance. While dressing nicely for your online Zoom meeting is still essential, the beauty filter can make you look more well-rested and alert. To use the beauty filter, click the up arrow next to Start Video, then click ‘Video Settings.’ Check the box for ‘Touch Up My Appearance,’ and watch the results transform before your eyes.
![]()
Emojis can add life to a meeting and convey your reaction to what is being said, even if you’re on mute. We recommend using the thumbs-up or clapping emoji to communicate praise or approval during the meeting. These emojis are positive and affirming without being too distracting.
Locate the bottom of your meeting screen to use emojis and click the Reactions tab. This tab will show the 40-plus emojis Zoom offers there. Click on one, and it will appear on the screen for everyone to see for approximately five seconds.
React with Emoji screen
If you’re muted in a meeting, you can still let others know your thoughts with emoji reactions. Send a thumbs-up, a clapping emoji, or dozens of other options to communicate without interrupting the meeting. To react during a meeting, click the Reactions tab at the bottom of the meeting screen (it’s in the same panel as mute audio and video, to the right) and choose the one you want. The emoji will disappear after 10 seconds. If the meeting organizer enables the nonverbal feedback feature, participants can choose the Raise Hand emoji option and wait to be recognized. Every participant will be able to see each other’s feedback.
Use a fun avatar – If unique backgrounds aren’t enough fun, Zoom lets you use avatar filters during meetings. Go to Settings > Background & Effects and select Avatars. From there, you can choose from various animals to replace you in a meeting.
Maximizing the tools available in Zoom can make your life and workday more effortless and effective. Choose a couple of these Zoom tips and tricks today to try and see how they impact your work meetings. Consider surveying your coworkers about steps you can take to improve your Zoom meetings, such as using a mouse spotlight or creating a recurring meeting link to eliminate confusion.
Conclusion
In conclusion, implementing these 21 Zoom tips for productive meetings in 2023 can greatly enhance your virtual collaboration experience. From optimizing audio and video settings to utilizing breakout rooms and interactive features, these tips empower you to maximize engagement, efficiency, and overall success in your remote meetings. Elevate your virtual meetings with these valuable insights and watch productivity soar.


