How to use Adobe Premiere Pro for Video Editing
Veejay Ssudhan
May 21, 2024Adobe Premiere Pro is one of the most powerful and widely-used video editing software available today. Whether you’re a beginner or an experienced editor, this guide will help you understand the basics and get you started with your first project.
Getting Started with Adobe Premiere Pro
Installation and Setup
Installing and setting up Adobe Premiere Pro is a straightforward process. First, head to the Adobe Creative Cloud website and sign in with your Adobe ID. Once signed in, locate Premiere Pro in the list of available applications. Click “Download” and follow the on-screen instructions.
After the download completes, open the installer and follow the prompts to complete the installation. Make sure your system meets the minimum requirements to ensure smooth performance. Once installed, launch Premiere Pro and sign in with your Adobe ID again.
You may need to configure your project settings and workspace according to your preferences. Import your media files, and you’re ready to start editing your videos.
Creating a New Project
Starting a new project in Adobe Premiere Pro is straightforward. First, open the software and click on “New Project.” A dialog box will appear, prompting you to name your project and choose a save location. Next, you’ll set up your project settings, including frame rate, resolution, and audio preferences.
Once configured, Premiere Pro’s interface opens with panels for media, timeline, effects, and more. Import your media files by dragging them into the Media Browser or using the “Import” option under the “File” menu. Organize your clips in bins for easy access. Now, you’re ready to start editing by dragging clips to the timeline and applying transitions and effects as needed.
Understanding the Interface
The Premiere Pro interface may seem overwhelming at first, but it’s organized into several panels that serve different functions:
- Project Panel: This is where you import and organize your media files.
- Source Monitor: Used to preview and trim your clips before adding them to the timeline.
- Timeline: Where you assemble your video clips, audio, and effects.
- Program Monitor: Displays the current frame of your timeline.
- Tools Panel: Contains tools for editing tasks like cutting, selecting, and moving clips.
- Effects Panel: Houses all the transitions and effects you can apply to your clips.
Importing Media
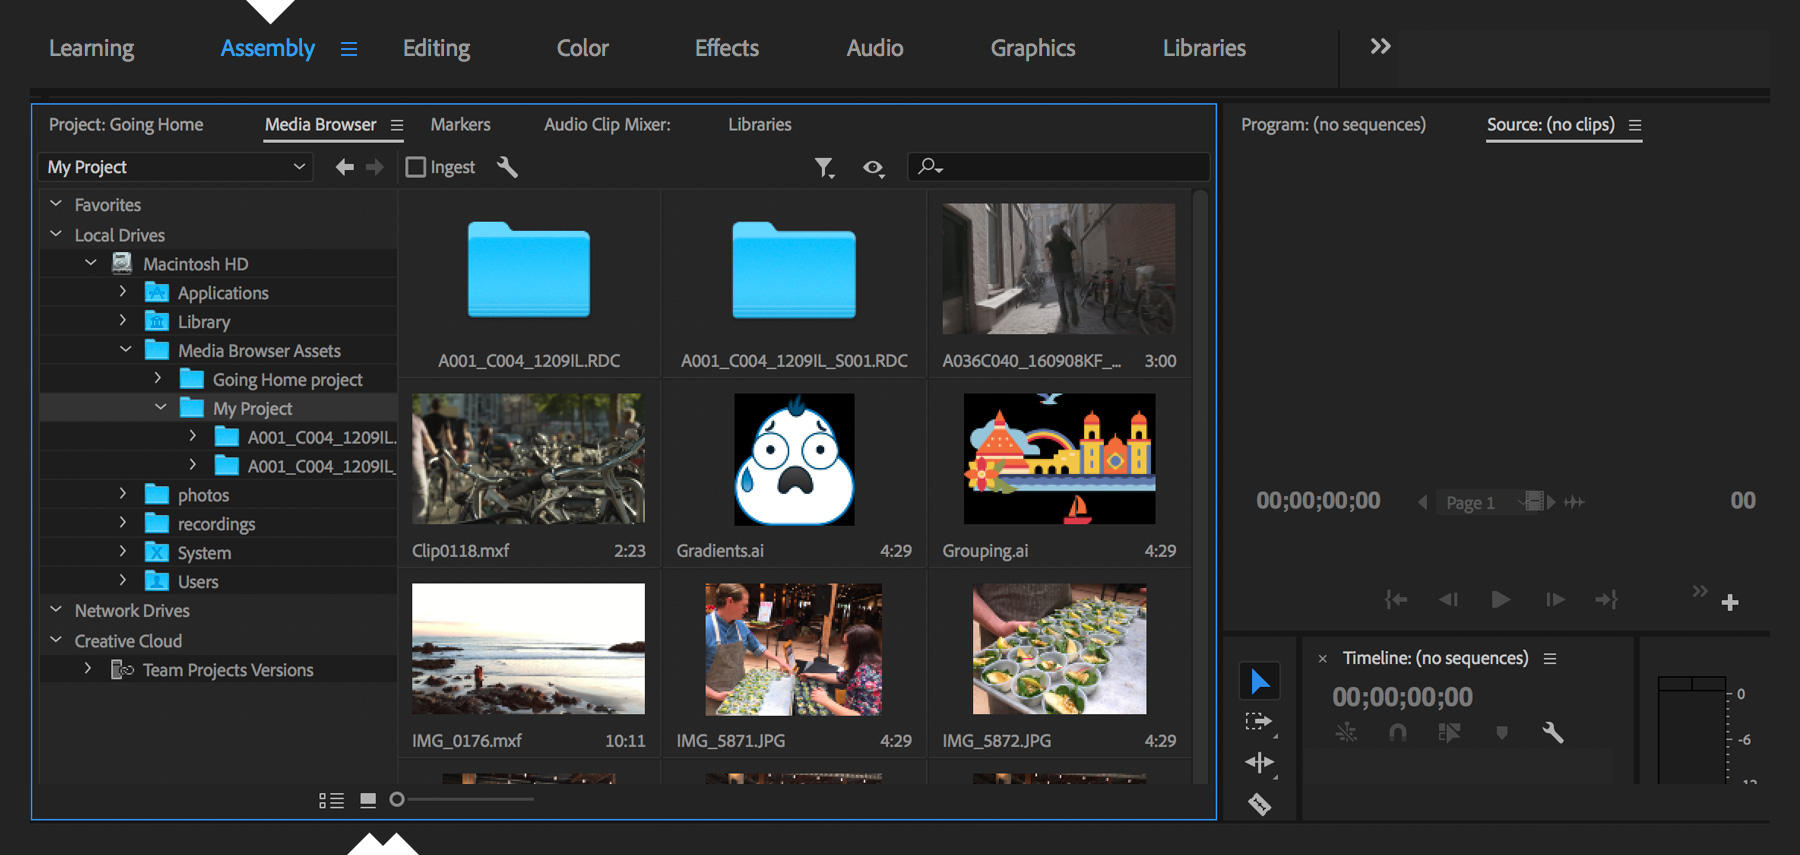
Importing media into Adobe Premiere Pro is a straightforward process that allows you to start your video editing project seamlessly. To begin, open your project or create a new one. Navigate to the “Media Browser” panel, which helps you locate and preview your media files. You can also use the “File” menu and select “Import” or press the shortcut Ctrl+I (Windows) or Cmd+I (Mac).
Once your files are selected, click “Open,” and they will appear in the “Project” panel. From there, you can drag and drop them into the timeline for editing. Premiere Pro supports a wide range of file formats, making it easier to work with various types of media, such as videos, images, and audio files.
Basic Editing Techniques
Adding Clips to the Timeline
Adding clips to the timeline in Adobe Premiere Pro is a straightforward process. First, import your video files into the project panel by dragging and dropping or using the “Import Media” option. Once your clips are in the project panel, simply drag them to the timeline. You can place them on any video or audio track, depending on your needs.
To ensure precision, use the playhead to mark where you want each clip to start. You can also use the “Insert” and “Overwrite” buttons for more controlled placement. Premiere Pro allows you to trim and cut clips directly on the timeline for seamless editing. With these tools, organizing and sequencing your footage becomes efficient and intuitive, making the editing process smoother.
Trimming Clips
Trimming clips in Adobe Premiere Pro is essential for refining your video edits. Start by importing your footage into the timeline. Use the Razor Tool (shortcut ‘C’) to cut clips at desired points. The Selection Tool (shortcut ‘V’) allows you to drag clip edges to trim them precisely. For more accuracy, use the Trim Mode by double-clicking the edit point, which opens the Trim Monitor.
Here, you can use J-K-L keys for playback and trimming. Ripple Edit Tool (shortcut ‘B’) helps in adjusting the clip duration without leaving gaps. Mastering these tools ensures a cleaner and more professional video edit.
Adding Transitions
Adding transitions in Adobe Premiere Pro is straightforward and enhances your video’s flow. To start, open your project and locate the “Effects” panel. Under “Video Transitions,” you’ll find various options like “Dissolve,” “Wipe,” and “Slide.” Drag your chosen transition to the cut point between two clips in the timeline. You can adjust the duration and alignment by dragging the edges of the transition in the timeline.
For more precise control, double-click the transition to open the “Effect Controls” panel, where you can fine-tune settings. Transitions can help you create smooth scene changes, add emphasis, or set the mood of your video, making your project more engaging and professional.
Working with Audio
Importing Audio
Importing audio into Adobe Premiere Pro is a straightforward process. Start by opening your project and navigating to the “Media Browser” panel. Locate your audio files on your computer and simply drag them into the “Project” panel. Alternatively, you can right-click in the “Project” panel and select “Import,” then browse to find your audio files.
Once imported, you can drag audio clips onto the timeline for editing. Premiere Pro supports various audio formats like MP3, WAV, and AIFF, making it flexible for different projects. Organize your audio tracks efficiently to keep your workflow smooth, ensuring a professional and polished final product.
Adjusting Audio Levels
To adjust audio levels, select the audio clip in the Timeline and go to the Effect Controls Panel. Use the volume slider to increase or decrease the volume. For finer control, you can add keyframes by clicking on the waveform in the Timeline and adjusting the volume at specific points.
Adding Background Music
Background music can enhance your video. Import a music track and place it on an audio track below your main audio. Lower the volume of the background music so it doesn’t overpower your main audio.
Applying Effects and Color Correction
Adding Video Effects
Adding video effects in Adobe Premiere Pro is a straightforward process that can significantly enhance your project. To start, import your video clips into the timeline. Navigate to the “Effects” panel, where you’ll find a wide range of effects organized into categories like “Video Effects” and “Audio Effects.” Simply drag and drop the desired effect onto your video clip in the timeline.
You can then fine-tune the effect using the “Effect Controls” panel. Adjust parameters like opacity, scale, and color to achieve the desired look. Premiere Pro also supports keyframing, allowing you to animate effects over time for dynamic results. Experiment with various effects to make your video stand out.
Color Correction
Color correction can make your video look more polished. Select a clip in the Timeline and go to the Lumetri Color Panel. Here, you can adjust exposure, contrast, highlights, shadows, and more. You can also apply LUTs (Look-Up Tables) for specific color grading styles.
Using Keyframes for Animation
Keyframes allow you to animate properties like position, scale, opacity, and rotation over time. To create keyframes:
- Select a clip in the Timeline.
- Go to the Effect Controls Panel.
- Click the stopwatch icon next to the property you want to animate (e.g., Position).
- Move the playhead to a different point in time and adjust the property value.
- Premiere Pro will automatically create a new keyframe.
Exporting Your Video
Once you’re happy with your edit, it’s time to export your video. Go to File > Export > Media. This will open the Export Settings dialog where you can choose your desired format (e.g., H.264 for MP4), resolution, and other settings.
Click “Export” to render your video. Depending on your project’s complexity and your computer’s power, this process may take some time.
Tips for Efficient Editing
Keyboard Shortcuts
Learning keyboard shortcuts can speed up your editing process significantly. Here are some essential shortcuts:
- C: Razor Tool (cut)
- V: Selection Tool
- I: Mark In (set an in point)
- O: Mark Out (set an out point)
- Spacebar: Play/Pause
- Cmd/Ctrl + Z: Undo
- Cmd/Ctrl + S: Save
Organizing Your Project
Keep your project organized by using bins (folders) in the Project Panel. Group related media together for easy access.
Proxy Workflow
If you’re working with high-resolution footage that slows down your computer, consider using proxies. Proxies are lower-resolution versions of your clips that make editing smoother. You can create proxies by right-clicking on your media in the Project Panel and selecting Proxy > Create Proxies.
Graphic Designer Tool
Adobe Premiere Pro is a powerful video editing tool widely used by graphic designers and video professionals. It offers a comprehensive suite of features, including timeline-based editing, color correction, and audio adjustments. The software supports a wide range of file formats, making it versatile for various projects.
Integration with other Adobe Creative Cloud apps, such as After Effects and Photoshop, allows for seamless workflows. Its user-friendly interface and customizable workspaces enable designers to tailor the environment to their needs. With Premiere Pro, graphic designers can create high-quality videos, animations, and visual effects efficiently and creatively.
The Role of Graphic Designer in Jewelry Industry has become elevated after the invasion of Automation and AI in Jewelry. Many jewellery companies when they hire Graphic Designers, look for talents with Adobe Premiere Pro.
Final Thoughts
Adobe Premiere Pro is a versatile tool that offers endless possibilities for video editing. By understanding its interface, mastering basic editing techniques, and utilizing its powerful features like effects and keyframes, you can create professional-quality videos.
Happy editing!
All Tags
Loading...
Loading...